
If you’ve ever run out of inputs while recording drums, multiple vocalists, or routing mixes to external gear, you know how limiting a small interface can feel. The good news? You don’t need to buy a whole new audio interface. ADAT (Alesis Digital Audio Tape) gives you a simple and powerful way to add more inputs and outputs to your system with just one optical cable.
In this guide, we’ll break down how ADAT I/O works, what gear you’ll need, and how to set it up using the iCON Harrison 32CI audio interface as an example. By the end, you’ll know how to expand your home studio affordably and efficiently.
ADAT is an optical digital audio format that can send up to eight channels of high-quality audio through a single lightpipe cable. Many modern interfaces support it, making it one of the easiest ways to scale your setup without replacing your gear.
At 44.1 kHz or 48 kHz: 8 channels of audio
At 96 kHz: 4 channels of audio
This makes ADAT especially useful for:
Recording full drum kits with multiple microphones
Tracking bands or ensembles at once
Sending audio to headphone amps, external converters, or outboard gear
To get started with ADAT, you’ll need:
An audio interface with ADAT input and/or output
(Example: iCON Harrison 32CI)
An ADAT expander
(Example: Arturia AudioFuse 8Pre)
An optical lightpipe cable
Matching sample rates and correct clock settings
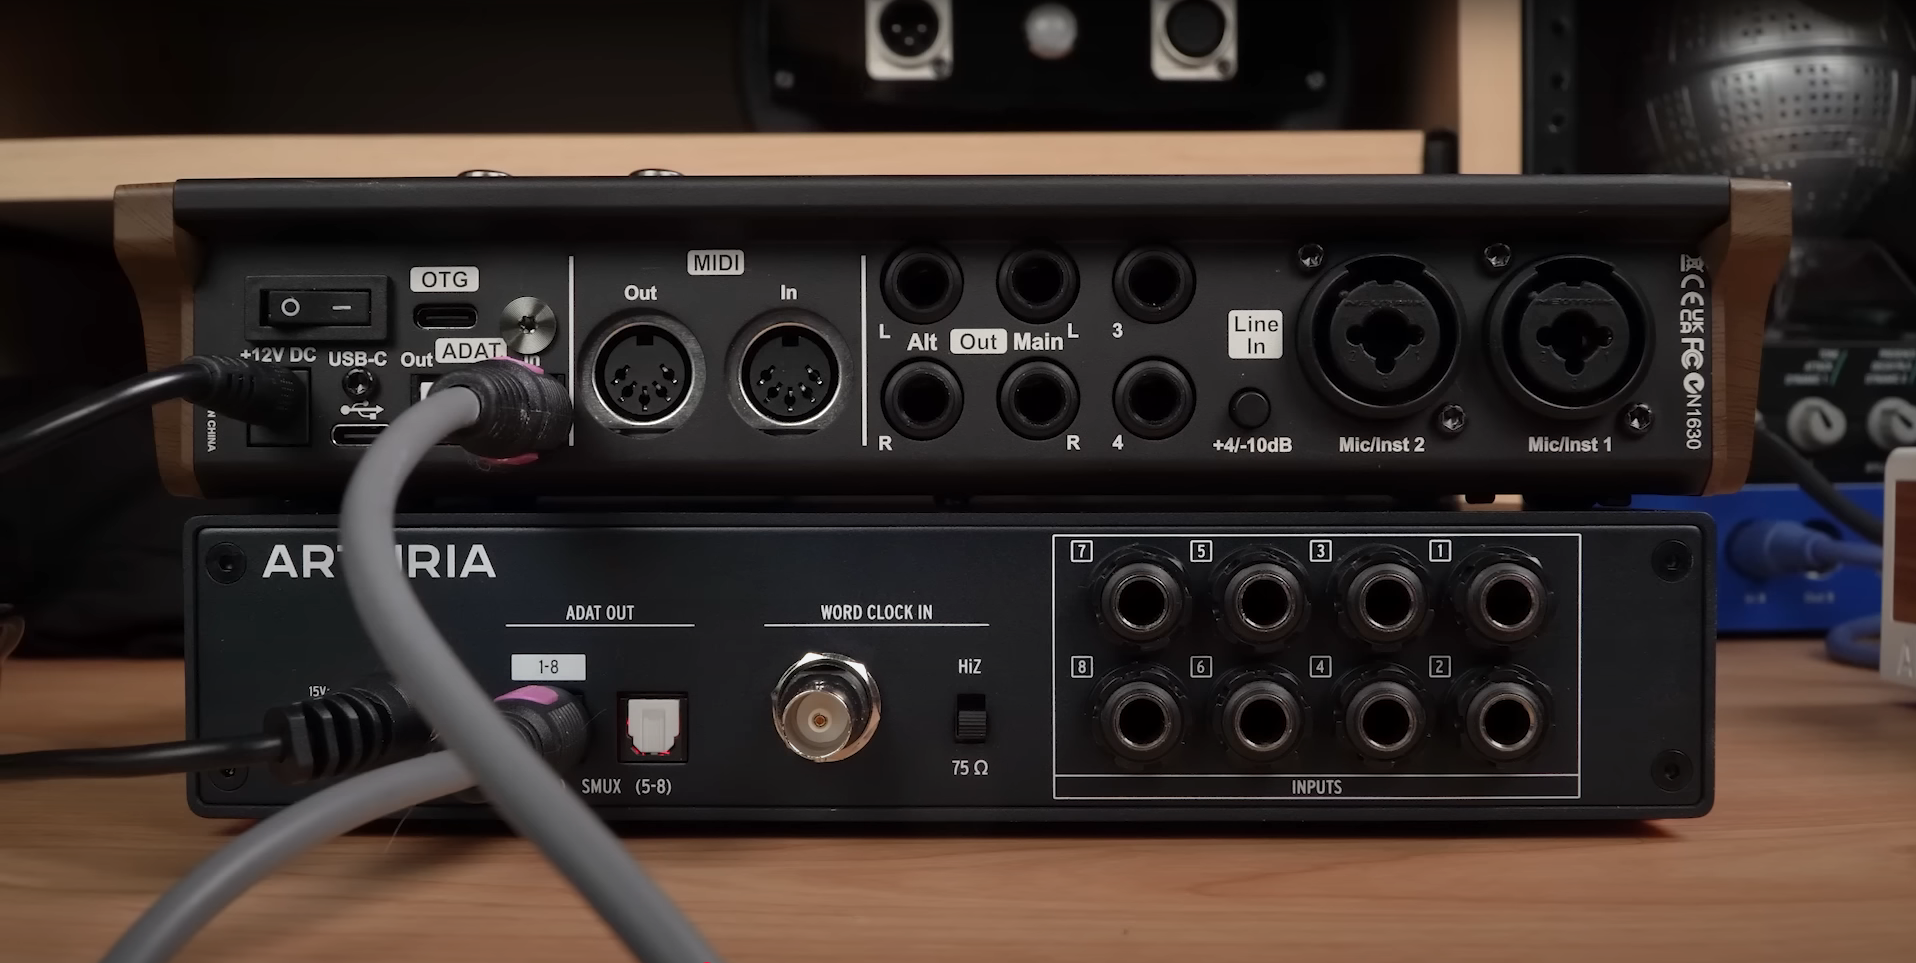
The iCON Harrison 32CI interface gives you two built-in inputs. By adding an ADAT expander, you instantly gain eight more mic or line inputs that show up in your DAW.
Here’s the basic connection:
Connect ADAT OUT on the expander to ADAT IN on the 32CI
Power on both devices
Set the same sample rate (44.1 or 48 kHz for eight channels)
Configure clock settings
Digital audio requires a master clock to keep everything in sync.
Master Device (usually your main interface): Set to Internal
Slave Device (the ADAT expander): Set to ADAT
This ensures both units are locked to the same timing. Only one master clock can exist in your setup, and the signal flows in one direction through the ADAT cable.
Some advanced gear also supports Word Clock (BNC) for even more reliable synchronization, but for most home studios, ADAT clocking is enough.
Once your hardware is connected and synced:
Open your DAW settings
Enable the additional ADAT inputs
Route them as you would any other channel
Now you’ll see all the extra mic/line inputs from your expander directly in your session.
If your setup doesn’t work right away, check these common fixes:
Make sure all devices use the same sample rate
Verify that your DAW has ADAT inputs enabled
Double-check clock source settings to avoid clicks, pops, or dropouts
Remember: at 96 kHz, ADAT supports only four channels
Whether you’re a home producer, session musician, or content creator, ADAT offers a cost-effective way to expand your recording system:
No need to replace your interface
Scales with your evolving needs
Works across many brands, not just iCON
With just one optical cable, you can double or triple your input count, making it easier to record bigger projects without the hassle.
ADAT is one of the most affordable, flexible, and future-proof ways to expand your audio interface. Whether you’re tracking a band, recording podcasts with multiple guests, or routing mixes to outboard gear, this simple connection can save you from hitting the limits of your setup.
To explore more about iCON’s ADAT-capable gear and control surfaces, visit iCON Pro Audio.
Subscribe to our mailing list to stay up to date with the latest product news, updates, and information.