
Bring motorized precision to your mobile mix.
Whether you’re mixing dialogue on set or capturing a live performance in the field, the iCON Pro Audio P1-M puts tactile control at your fingertips. When paired with a Sound Devices 8-Series recorder—like the 833, 888, or Scorpio—this compact, motorized fader controller transforms your rig into a hands-on production console.
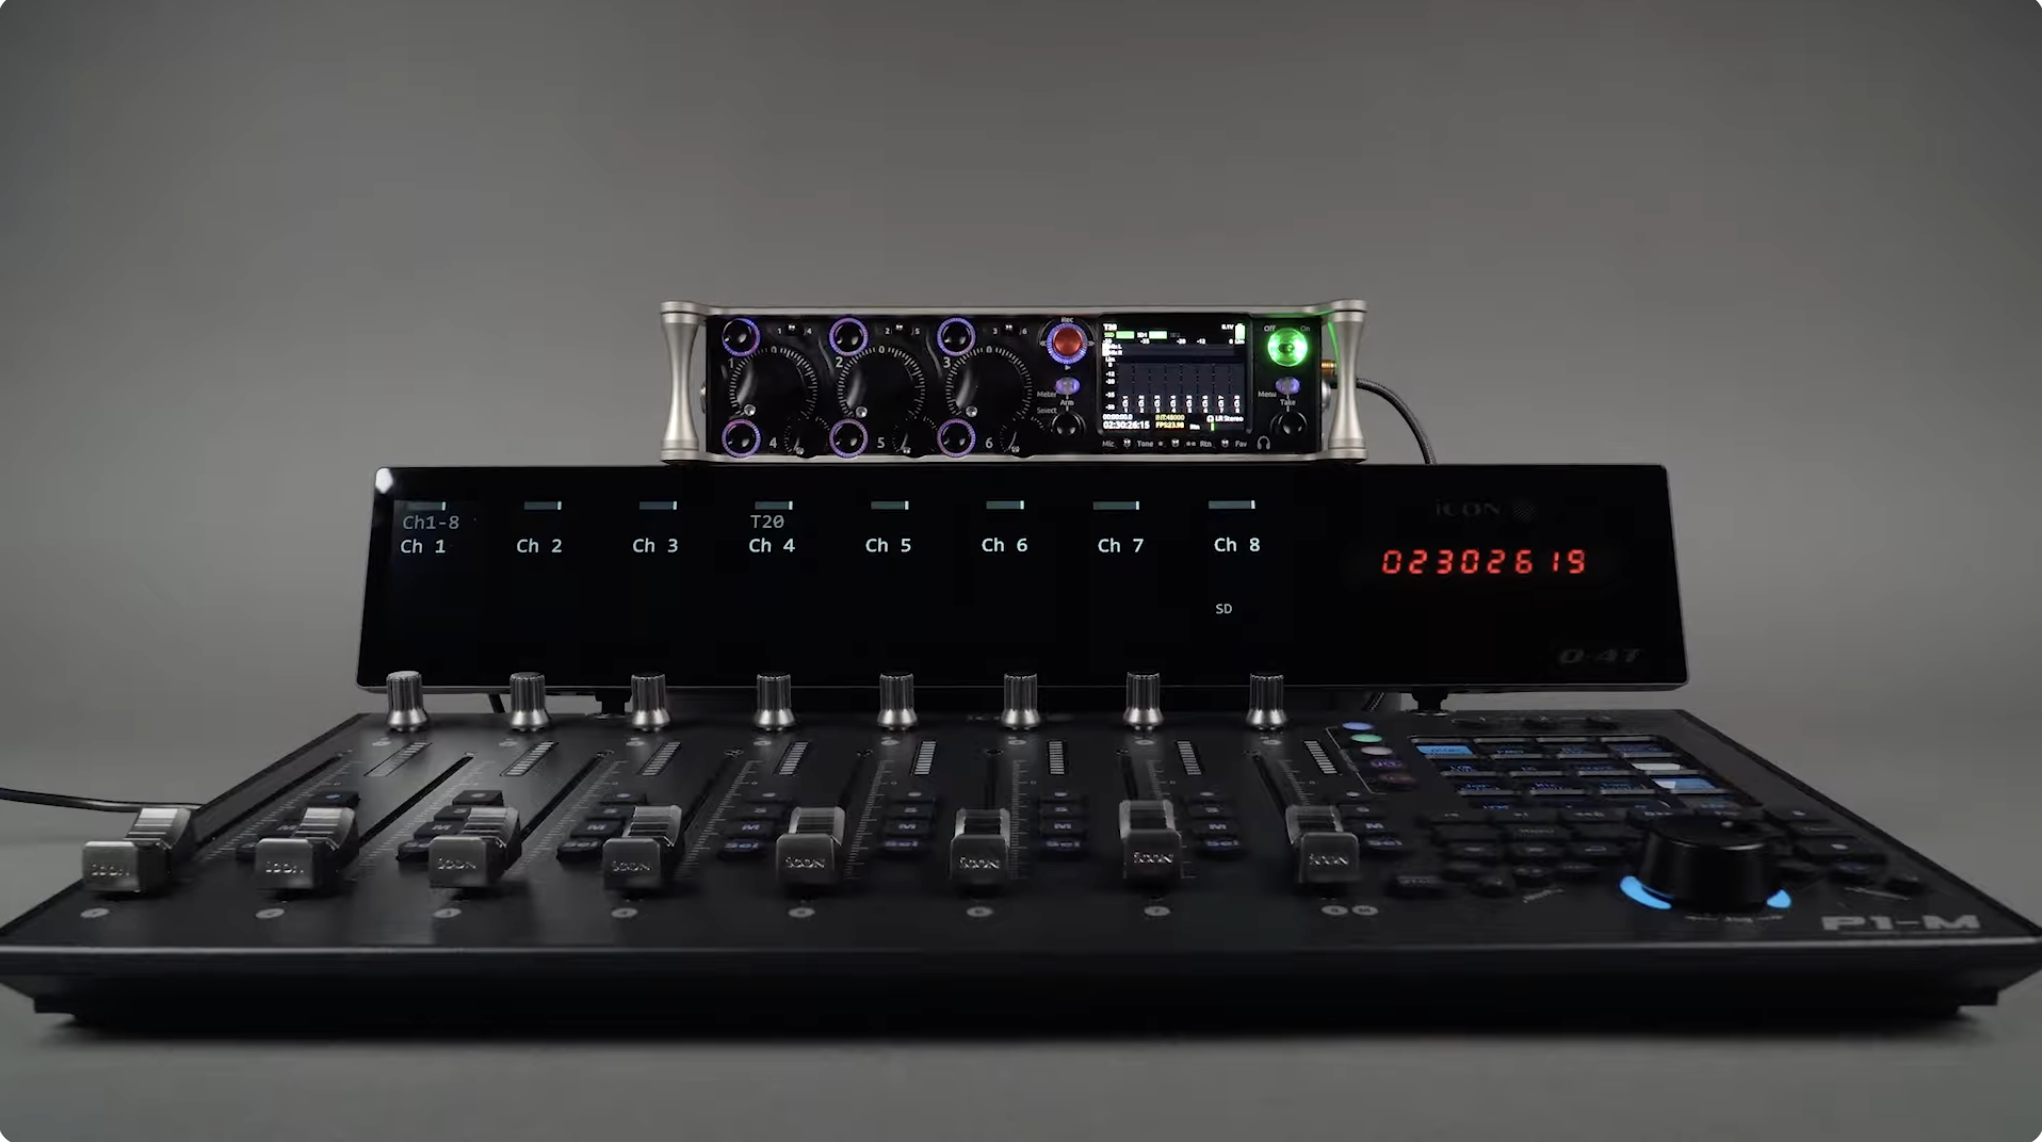
When you’re on set, every second counts. The P1-M gives you smooth, motorized faders that respond instantly to your Sound Devices recorder—perfect for adjusting dialogue levels during takes or fading ambient sound between scenes.
Add the optional D-4T TFT Display, and you’ll see track names, timecode, and levels in real time—right above your faders. No more menu diving. No more guesswork. Just focused, efficient mixing that keeps your ears and eyes where they belong: on the story.
iCON Pro Audio P1-M controller
D-4T display (optional, but recommended)
USB-C to USB-A cable and power adapter
Computer with iMAP software
Sound Devices 8-Series recorder (firmware 10.11 or later)
P1-M Controller Mapping File from the Sound Devices website
Download and install iMAP version 1.17 or newer from the iconproaudio.com P1-M product page.
Connect the P1-M to your computer via USB-C and power it on.
Attach the D-4T display—it magnetically locks in place and draws power directly from the P1-M.
Launch iMAP, select P1-M from the top-right dropdown, then choose Reset to Factory Default.
From the DAW dropdown, select Sound Devices and assign it to a DAW slot (1, 2, or 3).
Download the appropriate P1-M Mapping File (.xml) from sounddevices.com → Support → Downloads.
Mount your recorder (e.g., 833) in File Transfer Mode so it appears as a drive.
Copy the .xml file into the MIDI_MAPPING folder on your 8 Series device.
Eject and exit File Transfer Mode.
On your 8-Series:
Go to Menu → Controllers → Mapping → Load,
Select USB Drive Mode.
Press the headphone encoder to confirm.
Move a fader—watch the gain adjust in real time.
Arm, Mute, or Solo channels, and see instant response on your recorder.
The D-4T display will show track names, levels, and timecode perfectly in sync.
With the iCON P1-M and Sound Devices 8-Series, you get:
Motorized precision for smooth, responsive mixing.
Hands-on workflow that saves time during shoots.
Real-time visual feedback with the D-4T display.
Seamless integration through the official mapping file.
Whether you’re a film production sound mixer, broadcast recordist, or mobile engineer, this setup gives you more control—and confidence—on every take.
Learn more: iconproaudio.com/p1-m
Follow us: #iCONProAudio #SoundDevices #FieldRecording #FilmSound #AudioEngineering
Subscribe to our mailing list to stay up to date with the latest product news, updates, and information.